Screen Mirroing
Screen Mirroing (experimental)
- Project your computer screen onto your device s creen, or use your device screen as an extension to your computer by VNC.
- If your Mini Dock does not have Screen Mirroing, please go to Settings >>> Miscellaneous >>> Experimental Features and enable this feature.
Supporting software download
Configuration process
Screen Mapping(Windows)
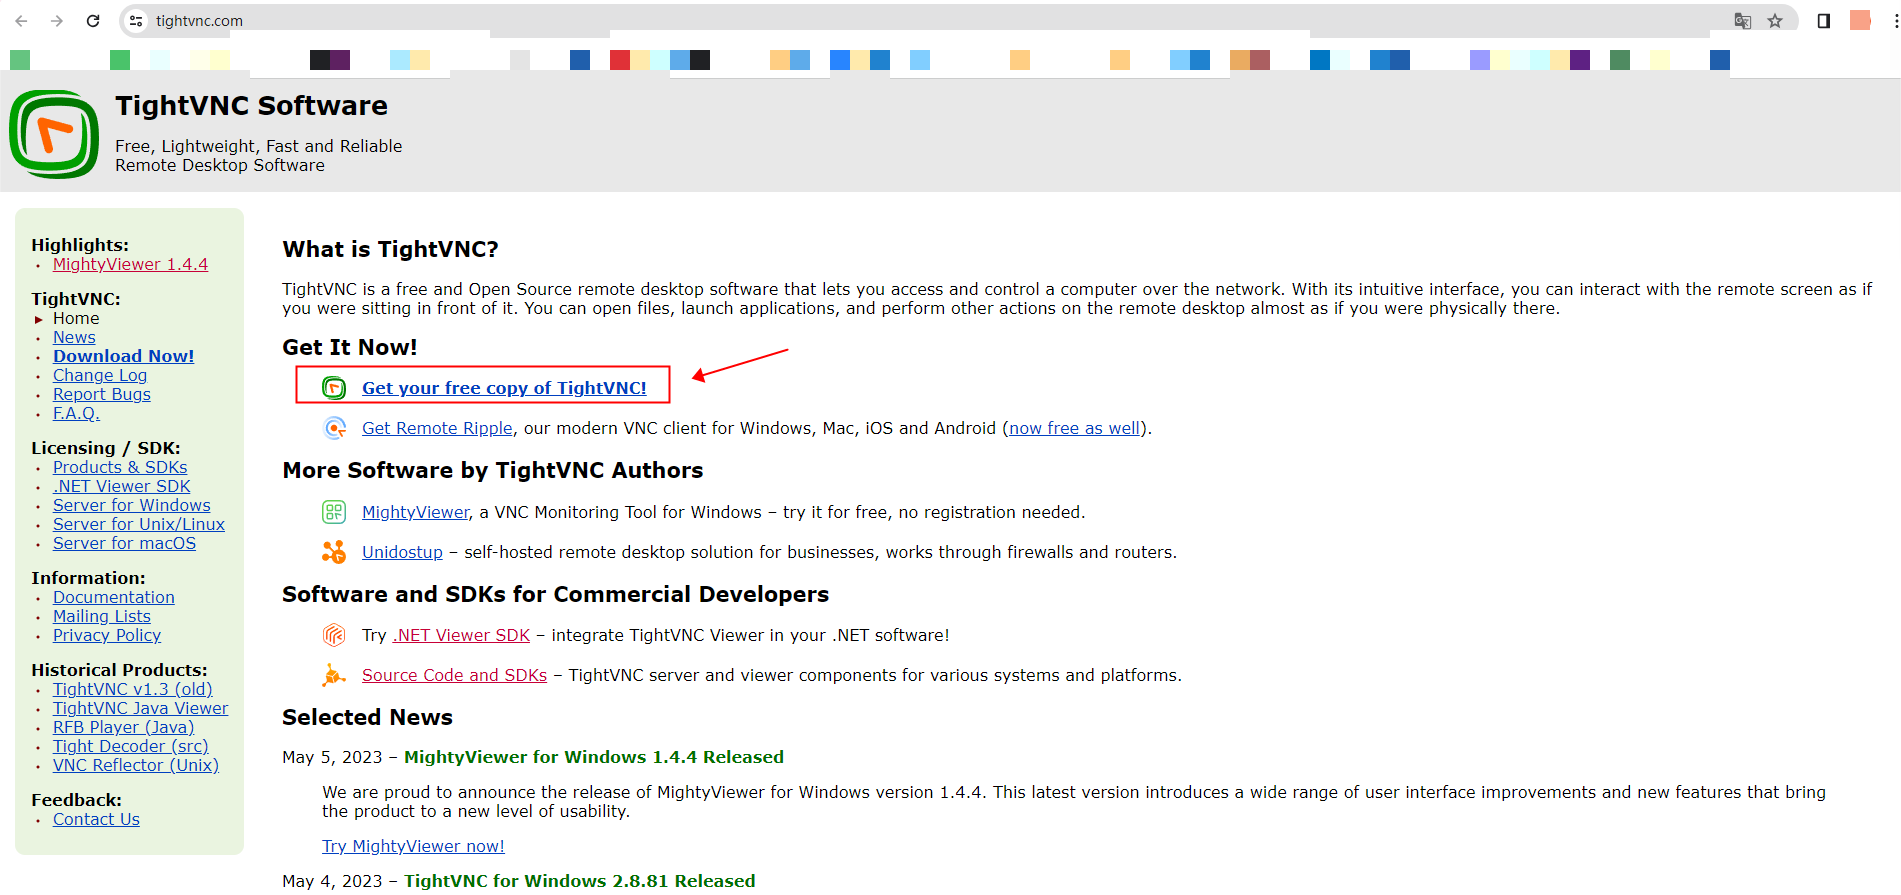
- Download the TightVNC
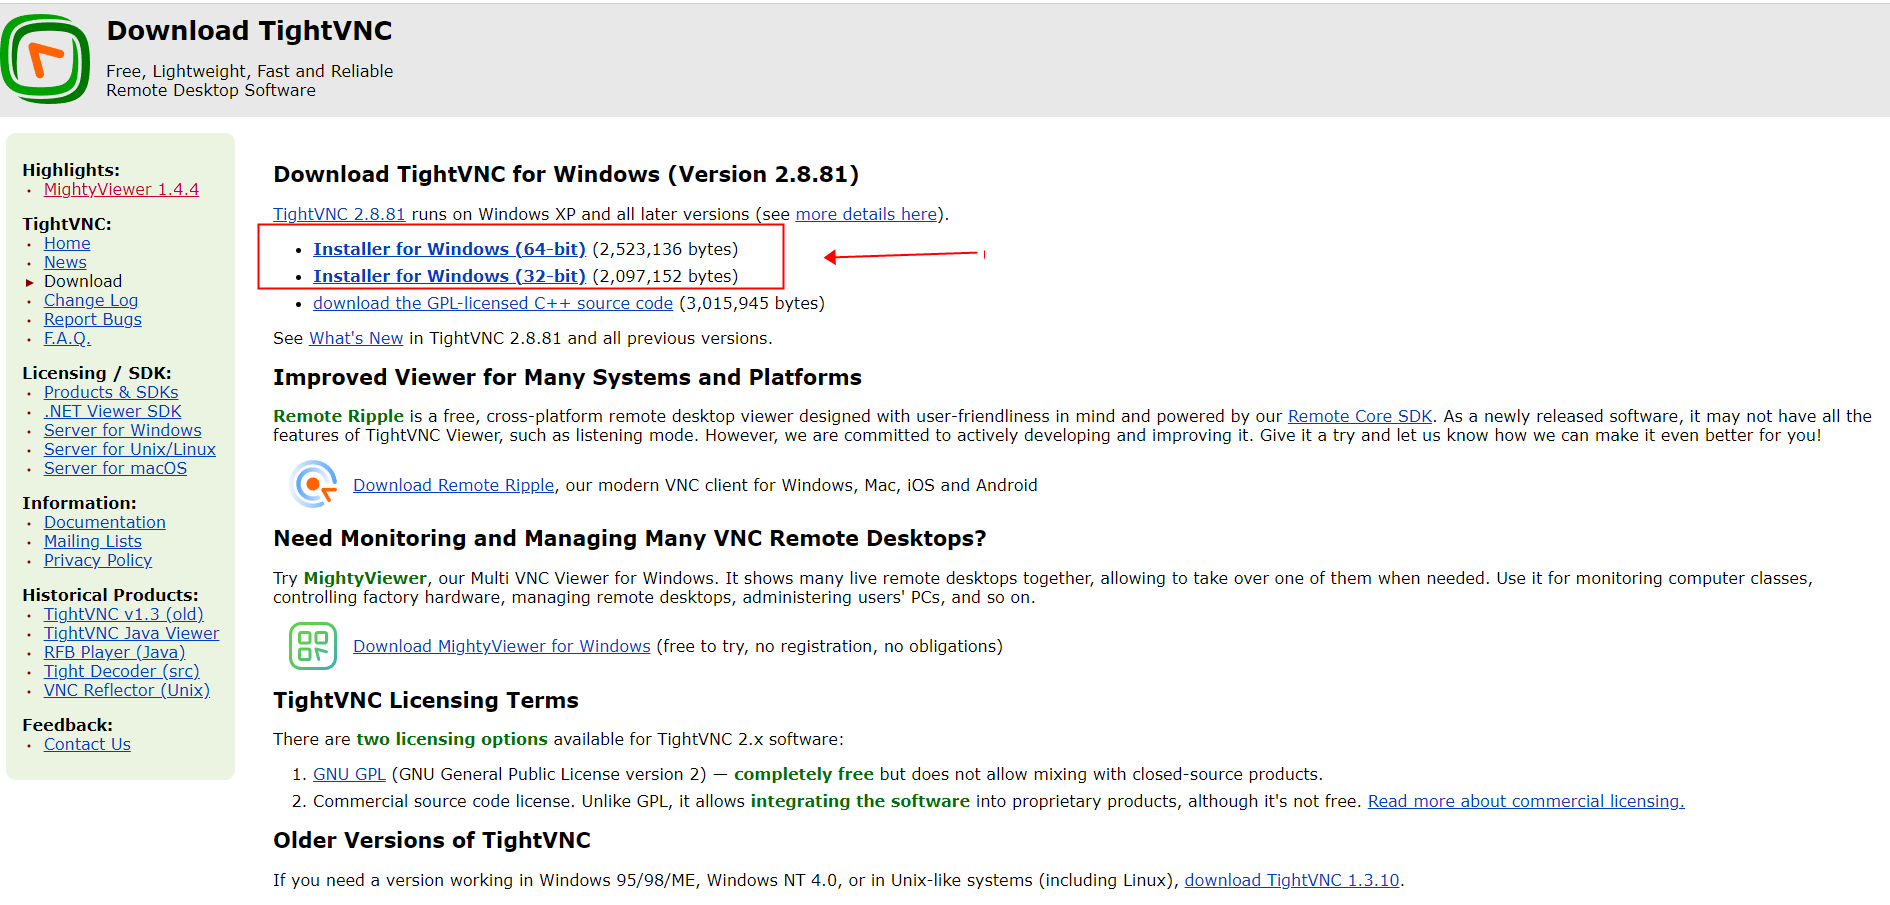
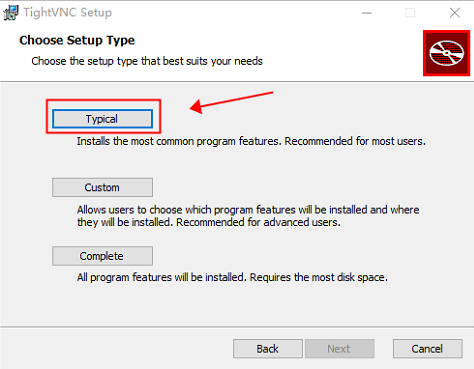
- Install TightVNC (choose "Typical" as setup type during installation)
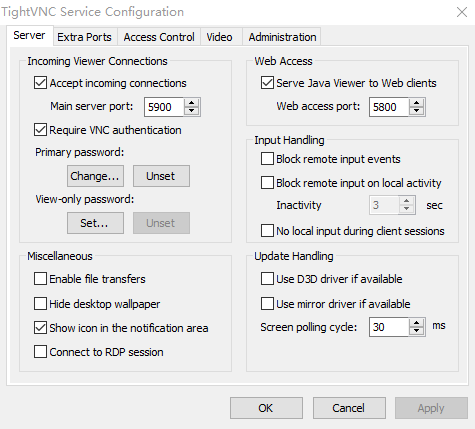
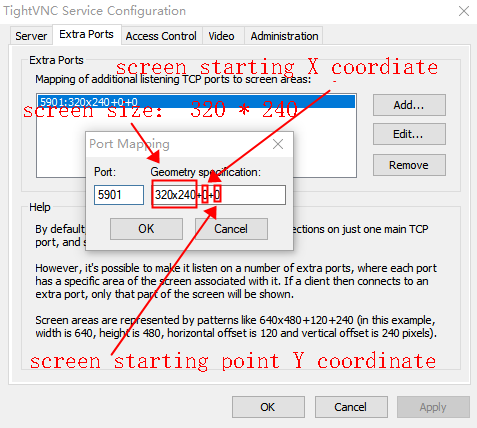
- Config the TightVNC(Refer to the picture below for configuration and click "Apply")
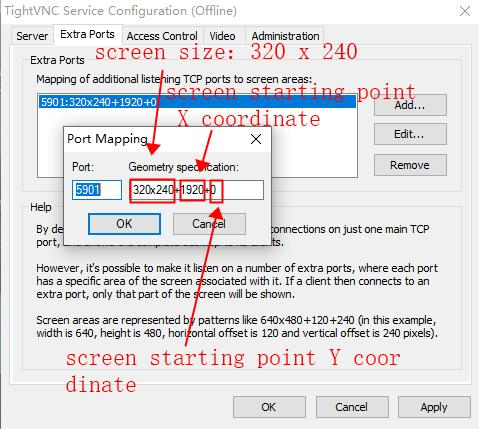
- click "add" and set the coordinate point of the screen projection(Set according to the actual situation needed.)(How to restart TightVNC if it is closed )
- Go to Vobot Mini Dock's Settings >>> Application Settings.
- Connect your smartphone or computer to the same network and access the website displayed on the screen( http://192.168.xxx.xxx/apps. Please do not leave this page while you configure).
- Click "Screen Mirroing" and enter the
- IP Address of The VNC.(Not Mini Dock's IP)
- Port of The VNC Server that you set
- Password of The VNC Server that you set
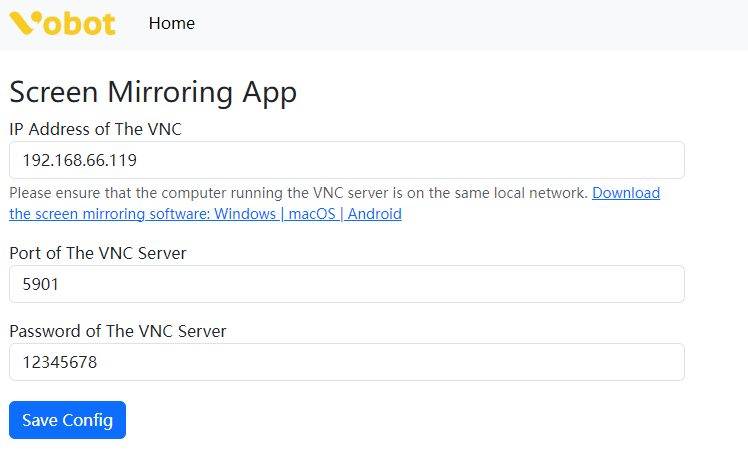
- Click "Save Config".
- Go to the Screen Mirroing app and use it.
Screen Mapping(MAC)
-
Enter commands at the terminal on your MAC.
brew install --cask vine-server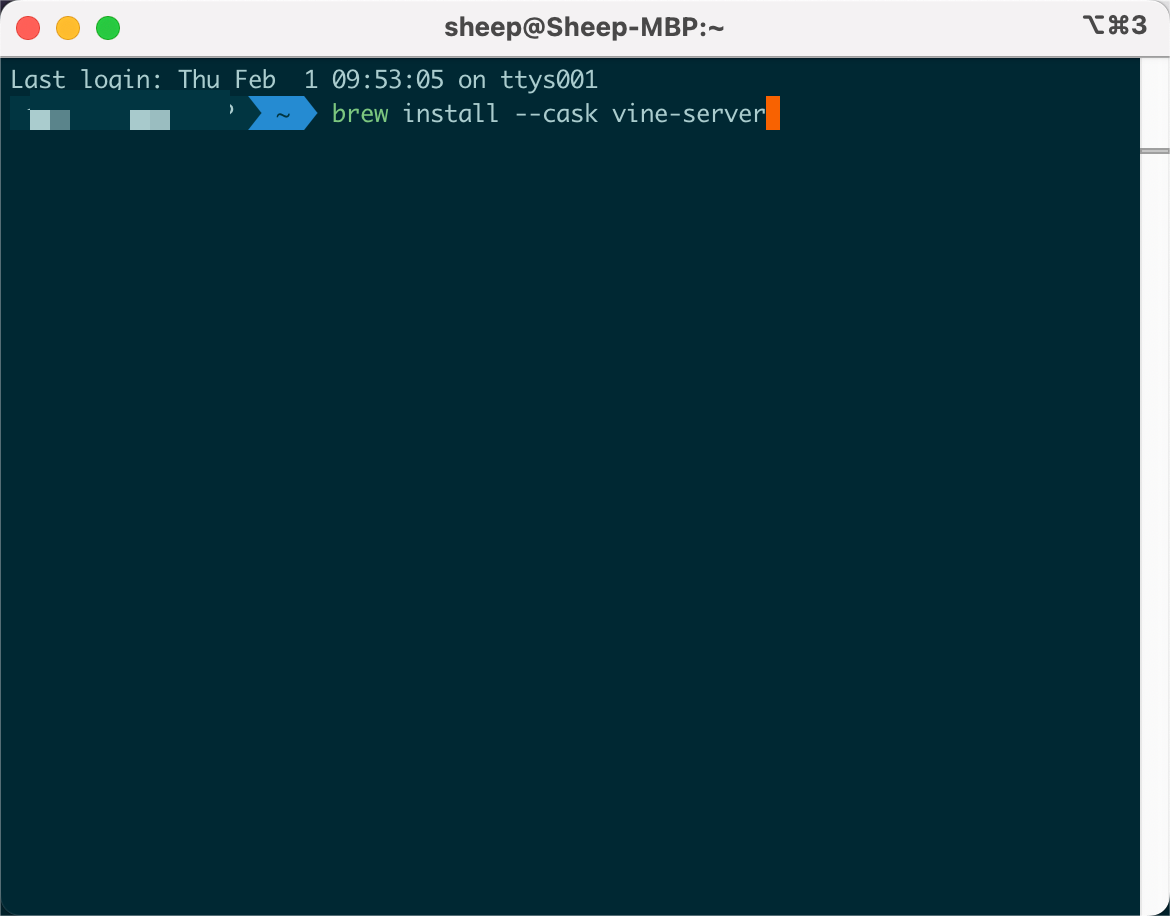
-
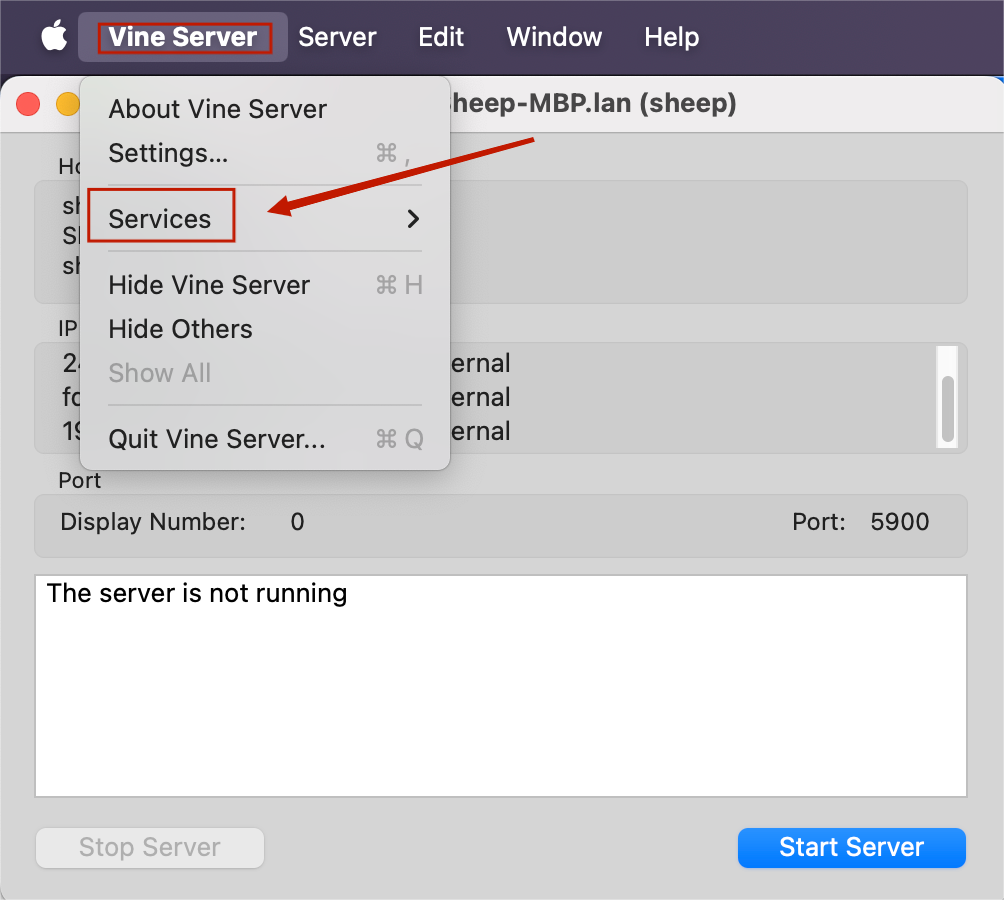
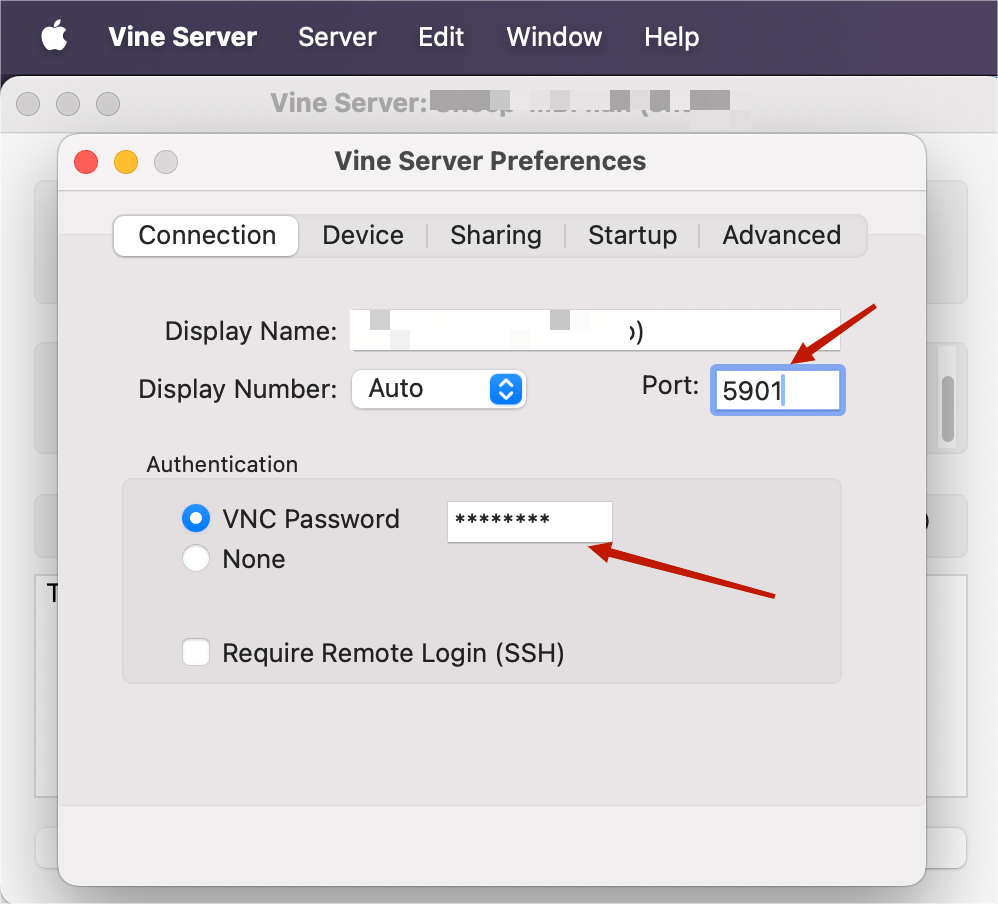
Run the vine-server on your MAC and click Vine Server > Settings...
-
Set the port and VNC password.
-
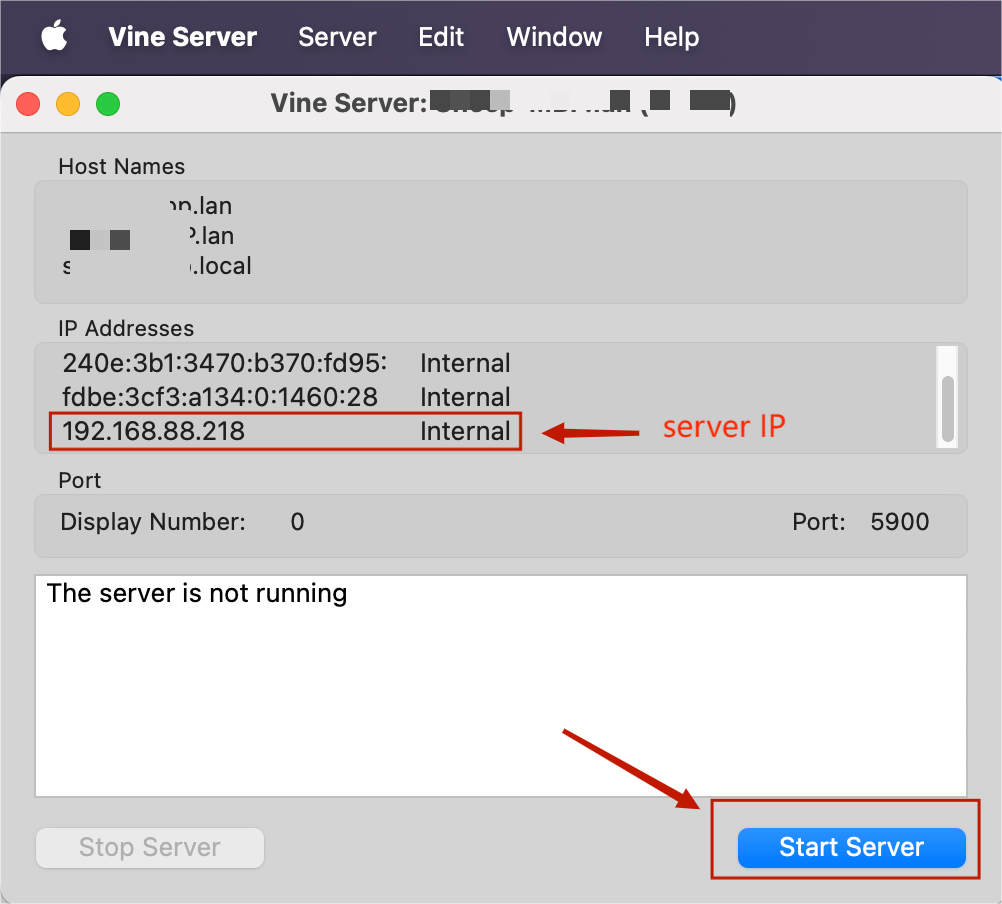
Click Start Server.
-
Go to Vobot Mini Dock's Settings >>> Application Settings.
- Connect your smartphone or computer to the same network and access the website displayed on the screen( http://192.168.xxx.xxx/apps. Please do not leave this page while you configure).
- Click "Screen Mirroing" and enter the
- IP Address of The VNC.(Not Mini Dock's IP)
- Port of The VNC Server that you set
- Password of The VNC Server that you set
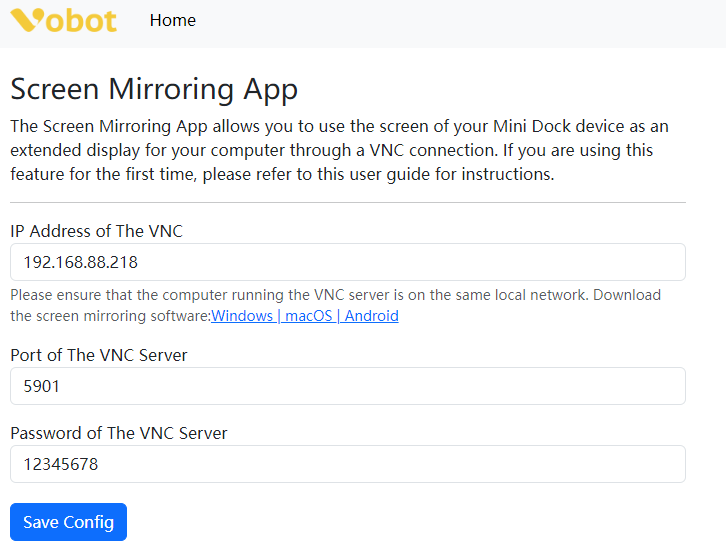
- Click "Save Config".
- Go to the Screen Mirroing app and use it.
Screen Mapping(Android)
-
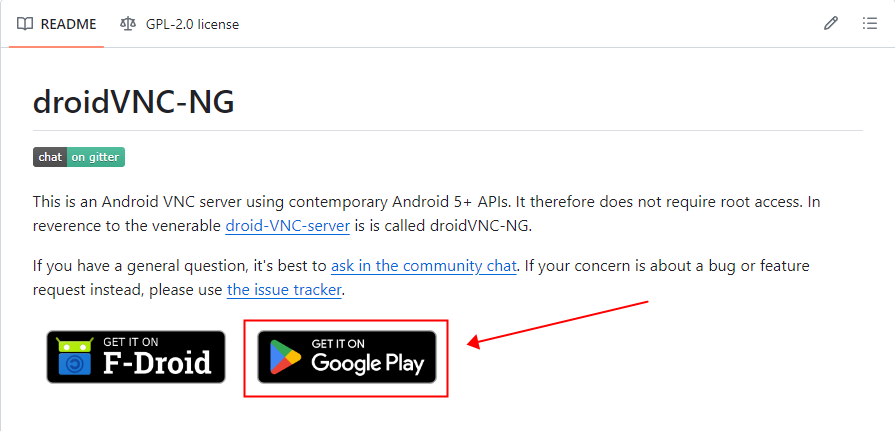
Download and install droid-VNC-server applications on your phone.
-
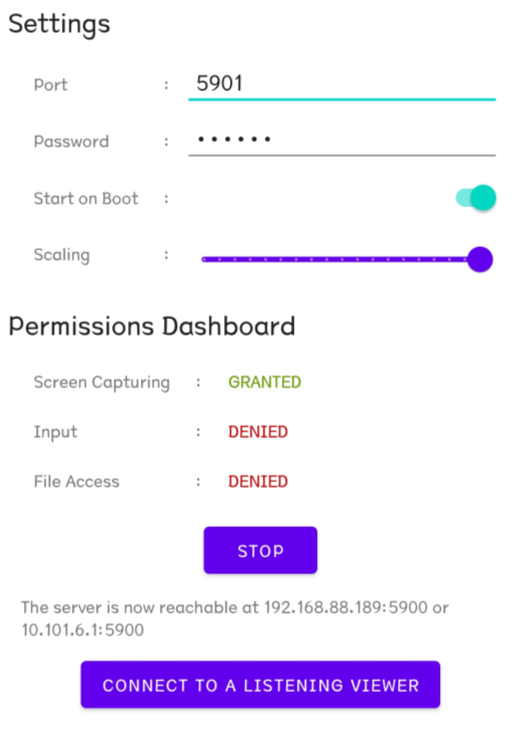
Get it all the permissions required.
- Set a good password and consider turning the Start on Boot off.
- Connect to your local Wi-Fi. For accepting a connection your device should be connected to some Local Area Network that you can control, normally it is a router. Connections via data networks (i.e. your mobile provider) are not supported.
- Click Start.
- Go to Vobot Mini Dock's Settings >>> Application Settings.
- Connect your smartphone or computer to the same network and access the website displayed on the screen( http://192.168.xxx.xxx/apps. Please do not leave this page while you configure).
- Click "Screen Mirroing" and enter the
- IP Address of The VNC serve.(Not Mini Dock's IP)
- Port of The VNC Server that you set(Note that it is the expansion port number)
- Password of The VNC Server that you set
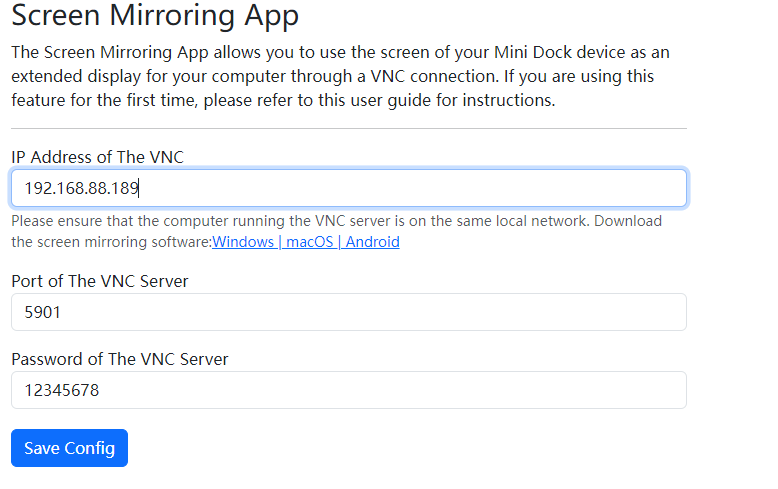
- Click "Save Config".
- Re-enter the app.
Screen Extension(Windows)
Download and Installation
Virtual Display Driver
-
based on Microsoft Indirect Display Driver Sample. This creates a virtual display in Windows that acts and functions just like a real one. It's useful for streaming, virtual reality applications, recording, headless servers, etc. The benefit over a physical display is the ability to adjust resolutions and refresh rates beyond the physical displays capabilities. For servers without displays, this enabled remote desktop and screen streaming to other systems as if there were a display installed.
-
This uses the official Windows Indirect Display Driver combined with the IddCx class extension driver.
Download
Installation
- Download the latest version from the releases page, and extract the contents to a folder.
- Copy
option.txttoC:\IddSampleDriver\option.txtbefore installing the driver (important!). - Right click and run the .bat file as an Administrator* to add the driver certificate as a trusted root certificate.
- Don't install the inf. Open device manager, click on any device, then click on the "Action" menu and click "Add Legacy Hardware".
- Select "Add hardware from a list (Advanced)" and then select Display adapters
- Click "Have Disk..." and click the "Browse..." button. Navigate to the extracted files and select the inf file.
- You are done! Go to display settings to customize the resolution of the additional displays. These displays show up in Sunshine, your Oculus or VR settings, and should be able to be streamed from.
- You can enable/disable the display adapter to toggle the monitors.
Videos
Previous Video: How to install a virtual display
Screenshots:
Settings
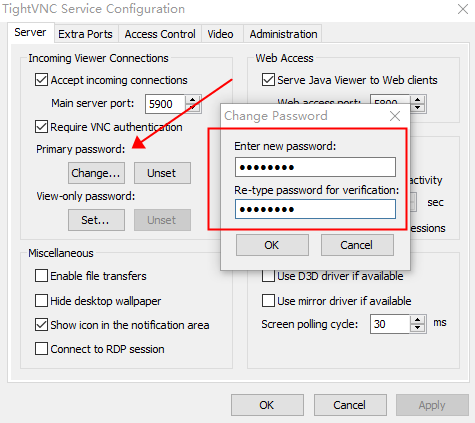
- Set password.
- Set the suitable coordinate point of the screen projection.
- Go to Vobot Mini Dock's "Screen Mirroing" app.how to restart TightVNC if it is closed
- Connect your smartphone or computer to the same network and access the website displayed on the screen( http://192.168.xxx.xxx/apps. Please do not leave this page while you configure).
- Click "Screen Mirroing" and enter the
- IP Address of The VNC.(Not Mini Dock's IP)
- Port of The VNC Server that you set
- Password of The VNC Server that you set

- Click "Save Config".
- Go to the Screen Mirroing app and use it.
- Serve connection failed?